Pages

Monday, December 5, 2011

why i love pinterest: diy ornament wreath


Well, my parents left yesterday, so after the next couple of posts, you might not see my mom's hands for a while.  But they'll be back for Christmas, so don't worry.  Well, you probably weren't worried.  That would just be me. 

I saw this wreath tutorial on pinterest and it looked so easy, I couldn't wait to try it!  If you'd like to try it, you'll need:

1 wire hanger
50-60 ball ornaments
thick ribbon, preferably wired
glue gun & sticks (if needed)

I picked up two big containers of balls at Walmart for 5 bucks a pop.  They came with 26 balls in each one, but you really need a few more than 52 to complete this.  The original tutorial said to use hot glue to secure the metal cap onto the ball, but when I went to do this, I couldn't pry the off.  So I figured they were secure!  Yes!  But I did have to create a circular shape out of the wire hanger.  Not as easy as it might sound.  But the good news is that it doesn't have to be perfectly round to work.
Now just start sliding the balls onto the wire!
Here it is with all my balls.  You can see it left a pretty sizable gap, but that is the reason behind the really huge ribbon bow.
So of course my mom got to work on a bow.
She'll have to do a guest blog on how to make one of her big-ass bows!  Because although I watched, I'm not sure I can imitate.  She also wrapped the hanger so you wouldn't see it.
And that's it!  I was going to use smaller balls with the big ones on this, and that probably would have looked pretty nice since they would have filled in some of the gap-age.  But it turned out pretty awesome despite it!
You can't help loving a project that is so easy but has so much impact!

Friday, December 2, 2011

diy cookie container for gifting

I like to give my neighbors cookies and treats at Christmas, and usually I go buy little bags or boxes to use.  But this year I tried to think of something I might have around the house besides paper plates, and I realized I just needed to start saving peanut butter jars, coffee containers, and formula tubs.  I have a whole stack of them in my pantry to pretty up for giving away cookies this year.  I did this one from a large peanut butter jar.

You'll need:

container of your choice with a lid
burlap
ribbon
sharp scissors
glue
Christmas paper
embroidery needle
ruler
tape measure

Start with a cleaned out container.  If you use a coffee container, soak it for a while with a water/baking soda solution to rid it of the coffee smell/flavor.  You could definitely use glass jars for this, too, like from salsa or pickles.  Or if you don't know what to do with your 25 mason jars in your basement.

First, measure your jar from the middle of the bottom to just beyond the top of the lid.  Here's my mom, helping out again. 
My jar was 8 1/2 inches, so I wanted a 17" x 17" square of fabric.  Measure and cut your square out.
You don't need to be super exact here.  The charm lies in the rusticness of this project. 
Now you'll want to cut the corners off of your square and do a rough circle shape.
Glue the bottom of your jar to the center of the burlap circle.  I put wax paper underneath since burlap is very porous.  And then you can peel off the wax paper after the glue is dry.
Press firmly and let it dry a few minutes.  Now grab your embroidery needle and thread your ribbon through.
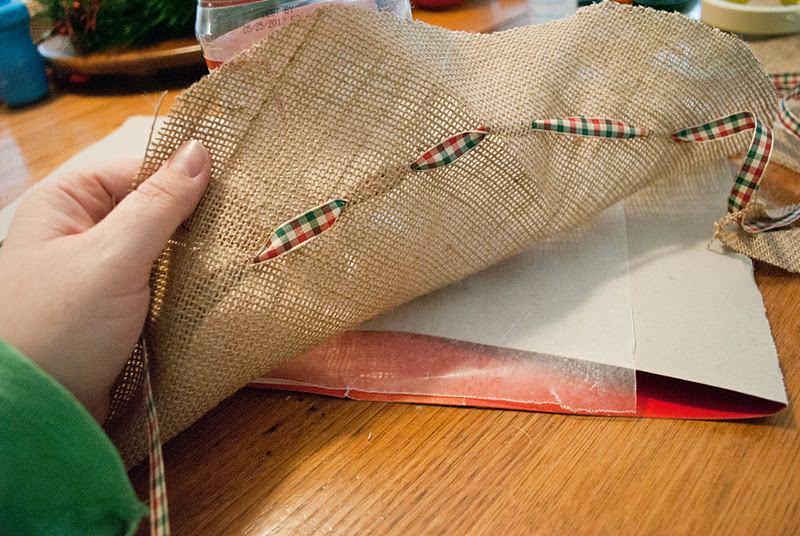
Sew around the edge of the circle, about 2 inches in.  This ribbon will gather in at the neck of your bottle, so you may want to check how far in you want to be before you start.  I didn't do an exact measurement, I just held it up for an idea of where it should be.  I varied my stitch length so that the gathers weren't uniform.  Feel free to be more precise if you feel compelled.
You can see above just how un-precise I can be.  Now pull your ribbon through so that you have 2 tails coming out right next to each other. 
Start pulling the ribbon tails so that the burlap starts to gather.
Pull as tightly as possible, and then tie a tight knot.
You can tie a bow here if you like what you see, but I wanted more ribbon showing overall, so I doubled the ribbon back over the stitched ribbon and tie a bow.

Now take off the lid, and find some pretty paper.  You could also use wrapping paper.
Trace a circle around your lid.
Since my lid was red, I cut the circle to fit slightly inside.  But you can cover the entire lid, and also use a ribbon around the edge if you don't like your lid.  You can write a message on the lid, or stick on a To: From: label.  Use glue to attach your paper circle to the lid.

Now fill up your jar with treats!
And now you have a pretty little present that's just a bit more special than cookies on a paper plate.
I'll have more cookie recipes soon, so get your jars ready!

Thursday, December 1, 2011

cookie #1: cardamom cookies


The first cookie recipe I'll share with you for Christmas is my favorite.  Cardamom cookies.  I make a lot of bar cookies for Christmas since they are so easy to make.  My mom started making these at Christmas when I was young, and we make them every year together.  They are buttery and crunchy, a bit spicy, and of course sweet!  They become a new favorite to pretty much everyone who tastes them.  Trust me.  You'll need:

your mom
10 x 15 pan
parchment paper
1 cup butter, softened
1/2 cup sugar
1/2 cup packed brown sugar
1 egg
1 tsp vanilla or almond extract
2 cups all-purpose flour
1 rounded tsp cardamom
1/4  tsp salt
1/3 cup chopped nuts (we used walnuts)

for frosting:
1 1/2 T butter
1 cup powdered sugar
1/2 tsp vanilla extract
1 to 2 T milk

First, put your butter in a big bowl and soften it in the microwave.
Add your sugars to the softened butter.
Cream the butter and sugar with your mixer.
Now separate your egg, and keep your egg white in another little bowl for later. 
Throw the yolk in your mixture. 
 Cream in your egg with the vanilla or almond extract.  We're using almond here.
Be sure to have a helper nearby to hold the tablespoons.  Extra points if she has a nutella beard.
Put your 2 cups of flour into another bowl and add your salt and cardamom.
Stir the flour mixture together.
Slowly add the flour mixture to the butter/sugar mixture while stirring or beating it together.
Spread the dough onto a pan lined with parchment paper.  Use your hands to smooth and pat it down.  If you use 3 year old hands, don't forget to wash them, or people won't eat your cookies.
Once it's all smoothed out, beat your egg white, and chop up your nuts if you didn't think ahead far enough to buy already chopped nuts.
Brush the dough with your beaten egg white.
Sprinkle on the nuts.
Bake at 275 degrees for an hour.  While you're waiting for it to bake, feel free to give broom rides around the kitchen! No comments about your mother-in-law on a broom, Brian.
When your hour is almost up, start making the frosting.  Melt the butter in a skillet.
You want your butter to get nice and brown.
Once it is brown, pour in the powdered sugar and stir.
Add in the vanilla extract, and add enough milk to bring the frosting to a drizzling consistency.
The cookies are finished when they are golden brown.
Pull them out and drizzle on the frosting.
Cut immediately, before it hardens too much.
Try not to eat the whole pan in one sitting.
Happy cookie baking!  I have more cookie recipes to share this month- probably all bar cookies.  And tomorrow I'll show you a great way to make a container to give away cookies as presents.